Connect and Manage AWS Accounts with Thunder
Thunder allows you to manage multiple AWS accounts and regions effortlessly. This feature is particularly useful for users working with diverse environments or projects spread across different AWS accounts or regions.
IAM
This method uses AWS Identity and Access Management (IAM) credentials for authentication.
Step-by-Step Instructions
-
Generate AWS Access Keys
- Log in to your AWS Management Console
- Navigate to IAM (Identity and Access Management)
- Click on Users in the left sidebar
- Select your user or create a new IAM user for Thunder
- Go to the Security credentials tab
- Under Access keys, click Create access key
- Choose Application running outside AWS as the use case
- Click Next
- Copy your Access Key ID and Secret Access Key (store the Secret Access Key securely)
- For detailed instructions, see AWS: Managing access keys for IAM users
-
Add Account to Thunder
- Navigate to your organization → AWS Accounts
- Click the button to add a new AWS account
- Select the Using Access Key option
- Enter your AWS account alias
- Paste your Access Key ID
- Paste your Secret Access Key
- Click Connect
-
Verify the Connection
- Once connected, your AWS account will appear in the AWS Accounts list
- You are now ready to deploy on AWS
Security Best Practices
- Use dedicated IAM users for Thunder rather than root account credentials
- Rotate access keys regularly (see AWS: Rotating access keys)
- Consider using temporary security credentials for enhanced security
- Apply principle of least privilege to your IAM user permissions
CloudFormation
This method uses AWS CloudFormation to set up the necessary permissions and resources.
-
Start the Setup
- Navigate to your organization → AWS Accounts
- Click the button to add a new AWS account
- Select the Using CloudFormation option
- Enter an alias for your AWS account
-
Create the CloudFormation Stack
- Click Open CloudFormation to go to the AWS CloudFormation console
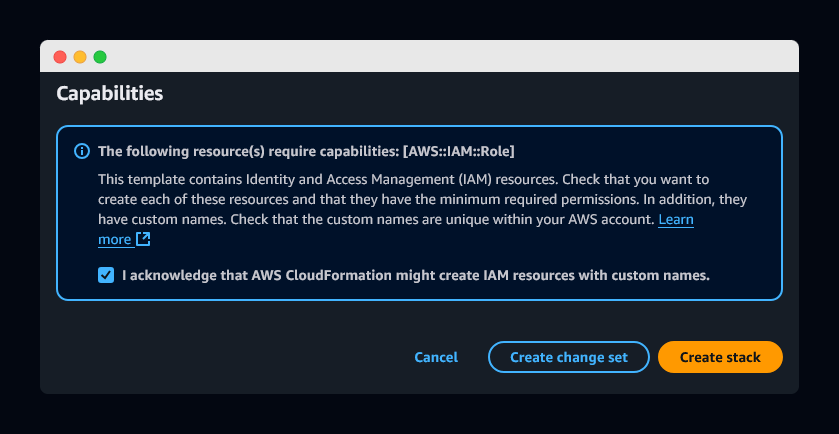
- Review the stack details
- At the bottom of the page, check the acknowledgment checkbox
- Click the
Create stackbutton
- Complete the Setup
- Wait for the stack to be successfully created
- Return to Thunder
- Your AWS account will now appear in your account list
You are now ready to deploy on AWS.